- Receiving support emails from users
- Processing forwarded attachments
- Replying to emails from customers
How does it work
Resend processes all incoming emails for your receiving domain, parses the contents and attachments, and then sends aPOST request to an endpoint that you choose.
To receive emails, you can either use a domain managed by Resend, or set up a custom domain.
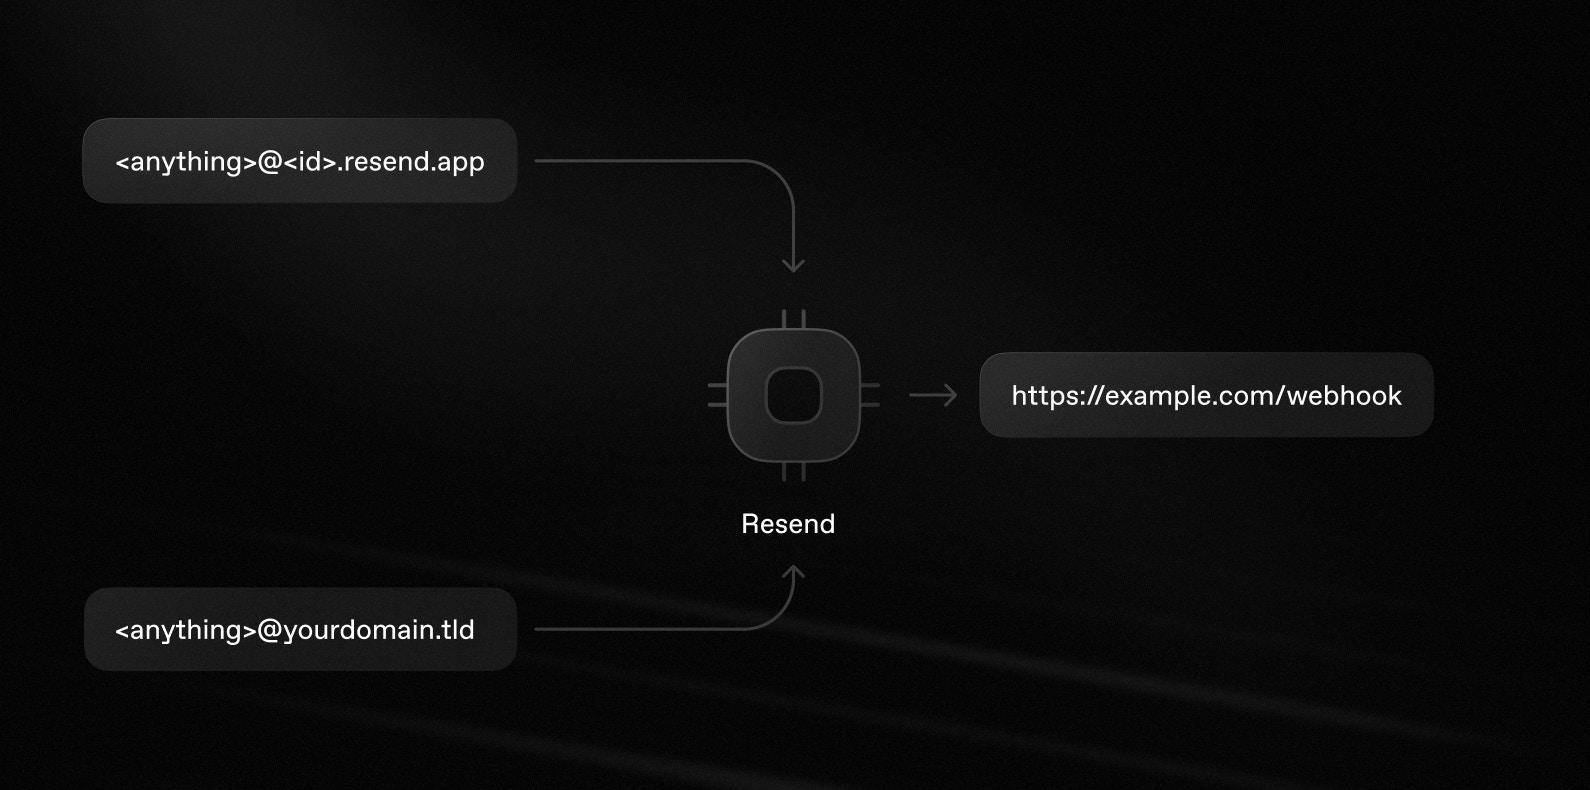
Importantly, any email sent to your receiving domain will be received by Resend and forwarded to your webhook. You can intelligently route based on the
to field in the webhook event.For example, if your domain is cool-hedgehog.resend.app, you will receive
emails sent to anything@cool-hedgehog.resend.app.The same applies to custom domains. If
your domain is yourdomain.tld, you will receive emails sent to
anything@yourdomain.tld.1. Get your .resend.app domain
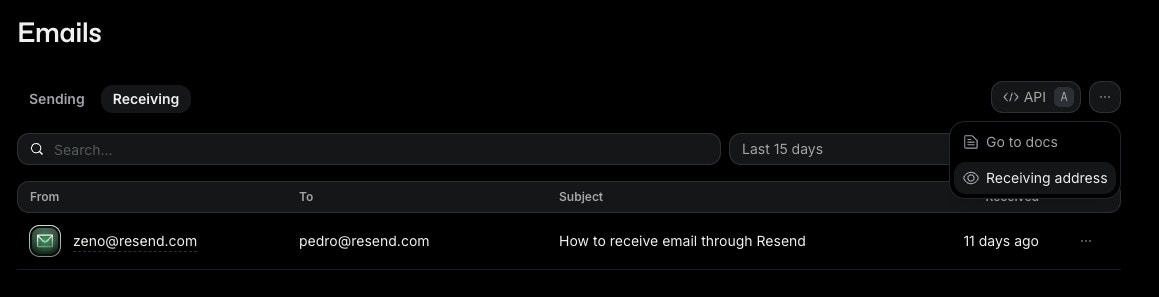
Any emails sent to an <anything>@<id>.resend.app address will be received by Resend and forwarded to your webhook.
To see your Resend domain:
- Go to the emails page.
- Select the “Receiving” tab.
- Click the three dots button and select “Receiving address.”
2. Configure webhooks
- Go to the Webhooks page.
- Click
Add Webhook. - Enter the URL of your webhook endpoint.
- Select the event type
email.received. - Click
Add.

3. Receive email events
In your application, create a new route that can acceptPOST requests.
Here’s how you can implement this:
What can you do with Receiving emails
Once you receive an email, you can process it in a variety of ways. Here are some common actions you can take:- Get email content
- Process attachments
- Forward emails to another address
- Reply to emails in the same thread
Webhooks do not include the email body, headers, or attachments, only their
metadata. You must call the Received emails
API or the Attachments
API to retrieve them.
This design choice supports large attachments in serverless environments that
have limited request body sizes.
FAQ
Will I receive emails for any address at my domain?
Will I receive emails for any address at my domain?
Yes. Once you add the MX record to your custom domains, you will receive emails for
any address at that domain.For example, if your domain is
yourdomain.tld, you will receive
emails sent to <anything>@yourdomain.tld. You can then filter or
route based on the to field in the webhook event.The same applies if you use the domain managed by Resend. If the domain given to you is cool-hedgehog.resend.app,
you’ll receive any email send to <anything>@cool-hedgehog.resend.app.Can I receive emails on a subdomain?
Can I receive emails on a subdomain?
Yes. You can add the MX record to any subdomain (e.g.
subdomain.yourdomain.tld) and receive emails there.Should I add the `MX` records for my root domain or a subdomain?
Should I add the `MX` records for my root domain or a subdomain?
If you already have existing MX records for your root domain, we recommend
that you create a subdomain (e.g.
subdomain.yourdomain.tld) and add the MX
record there. This way, you can use Resend for receiving emails without
affecting your existing email service.If you still want to use the same domain both in for Resend and your day-to-day
email service, you can also set up forwarding rules in your existing email service
to forward emails to an address that’s configured in Resend or forward them directly
to the SMTP server address that appears in the receiving MX record.Will I lose my emails if my webhook endpoint is down?
Will I lose my emails if my webhook endpoint is down?
No, you will not lose your emails. Resend stores emails as soon as they come
in.Even if your webhook endpoint is down, you can still see your emails in
the dashboard and retrieve them using the Receiving
API.Additionally, we will retry delivering the webhook event on the schedule
described in our webhooks documentation
and you can also replay individual webhook events from the
webhooks page in the dashboard.
How can I make sure that it's Resend who's sending me webhooks?
How can I make sure that it's Resend who's sending me webhooks?
All of Resend’s webhooks include a secret and headers that you can use to verify
the authenticity of the request.In our SDKs, you can verify webhooks using
You can find more code samples and instructions on how to verify webhooks in our
webhook verification documentation.
resend.webhooks.verify(), as shown below.Try it yourself
Next.js (TypeScript)
See the full source code.
Next.js (JavaScript)
See the full source code.
PHP
See the full source code.
Laravel
See the full source code.
Python
See the full source code.
Ruby
See the full source code.